The Multi-Photo Polls is an add-on feature you can choose to install to your site. It is a photo contest that your website visitors can participate in by uploading their photos and voting. The administrator can choose when the close date will be for each contests 'run'. The photo with the most votes at that time is automatically declared the winner and it added to the winners archives. Below we will explain the basics of managing your Muti-Photo Polls.
This Poll is offered in addition to our original Photo Polls plugin. It is different in the way that it will allow you to run many polls at one time as well as collect for multiple upcoming contests at one time. You can classify your contests by category and place them in a pending or active status.
Next, it is important to know that just installing a plug-in does not make it accessible to your website's visitors. Once it has been installed, you will need to go to the Page Editor and 'set it up' completely for your visitors. You will need to make it 'active', tell it where you wish the navigation link to display, and assign it the proper 'plug-in'. How to do this is explained below:
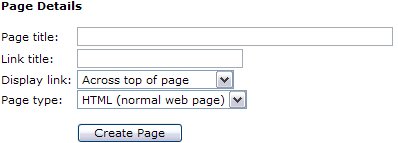
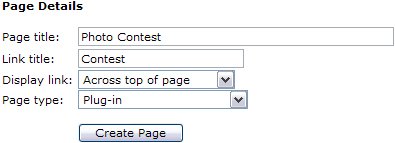
After clicking your Page Editor icon in your Admin Control Panel, you will need to click the text link for a New Page. In this example, we are going to set up the Photo Poll plug-in. In the Page title we have inserted the page name. This title is also what will be displayed in your navigation menus. In the Link title I have entered Contest. Remember, this is the name file that will be created and must be one word. Next decide where you wish the link to display. And finally, since this is a Plug-in, change the Page type from HTML, to Plug-in. Click the Create Page button to continue.
Please do NOT use any HTML in the fields shown above or below!
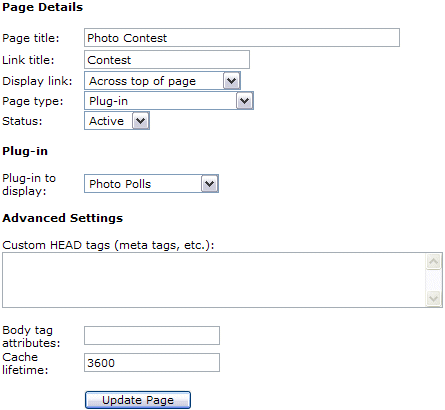
To complete the activation of your new Plug-in, you will need to change the Status from Hidden to Active. Next you will need to change the Plug-in to display from the default 'Business Directory' to the 'Photo Polls', or whichever Plug-in you are actually installing.
See left example of changes.
Finally select Update Page.
After you have completed these steps, you can return to the Control Panel.
You will now be able to see and select the Muti-Photo Polls icon in your Administrators menu to set up your plugin!
Upon logging into your Multi-Photo Polls admin panel, you will see the following icons.
Home
Polls
Settings
Home This link brings you back to the Control Panel Home.
Settings
This is where you will set up your Plugin options and add any custom text either above of below the contest categories on the Multi-Photo Polls Page. You will need to decide how votes will be recorded. You have two options as shown blow:
Vote counting method:
Users must login to vote
Votes are counted by user account (reliable, but requires login prior to voting)
Users need not login to vote
Votes are counted by IP address (less reliable; disallows votes from multiple users in same household, and may permit double-voting in some situations)
Either method is ok, but as with any poll conducted, there is room for error and ways for some unscrupulous users to cheat. It is important for you as admin to fully understand that this plugin is intended for entertainment purposes only and to allow one way for your visitors to interact with your site and that some cheating may occurr.
Content This section will allow you the ability to place content using the editor above and/or directly below the categories on the Multi-Photo Polls page. This is optional, if you need additional space to provide instructions, or an announcement.
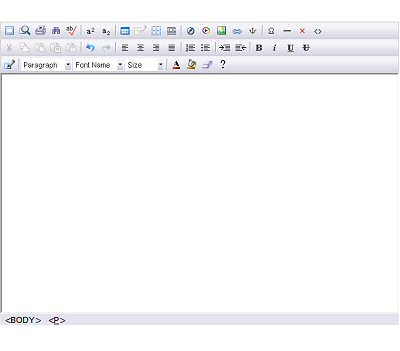
When selecting the 'Edit Text' button for either above or below the categories, you will be viewing the WYSIWYG Editor tool.
How to use this Editor is explained in the Page Editor chapter of our guide.
For a complete list of the WYSIWYG Icons and what they do,
please click here.
Polls
In this section, you will be able to create contest categories for your photo polls.
Accepting Submissions:
When you first click this icon, or you first enter your Multi-Photo Polls plugin, you will see the following:
The text seen here will show when no categories have yet been created. Click the 'Create new poll' link to begin.
In this area, you will need to first name your Poll in the Poll Title field. This should be able to give the user an idea of what type of pictures you will be accepting.
Next in the Poll Status field, you will want to choose the option for Accepting Submissions.
Finally, for the Poll Introduction, you can use this area to dress up the submission and voting area with a bit of instructions or perhaps announce a prize to be won. You will be able to return to this area to make changes when you are ready to make this poll active for accepting votes from your users. Click the
button at the bottom of the page to save your changes and continue.
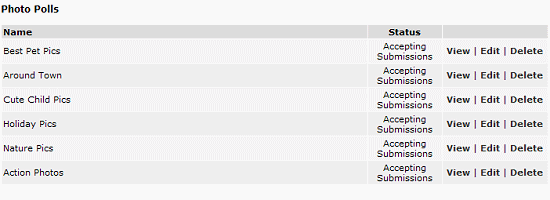
After you have created a few poll categories your admin area will look like the following and you will have several options available to you.
The name of your poll will appear in the Name column and the polls current status will appear in the status column. This will help you to remember which are accepting submissions, which are accepting votes and which have ended.
The View link will allow you to review and accept any submissions sent to the current poll. If you find the photo unacceptable it will be in this area you can choose to delete it.
The Edit link is where you will change your polls status as mentioned above and where you can alter the Introductory text of needed.
The Delete link will remove the poll, and any photos attached with said poll. This cannot be undone so please use care when clicking this option.
Activate Poll and Accepting Votes: When you poll has receieved the submissions you were awaiting and it is time to start accepting votes, you will need to click the 'Edit' link for the Poll you wish to activate.Next you will need to change the staus using the drop down bar from Accepting submissions to Active and accepting votes. You can also change your Introduction text at this time if applicable.
Click the
button at the bottom of the page to save your changes and continue.
Approving Photo Submissions
Once a user has submitted photos, you will need to review and approve them. The View link will allow you to review and accept any submissions sent to the current poll.
In the View Poll section, you will see your Poll details such as Title, Introduction text, Status, and a limages submitted. Here you will need to choose to either Approve the Pending images or Delete them if they are not acceptible. Clicking the Approve link as circled in the below image will change their status from Pending to Approved.
If you find the photo unacceptable it will be in this area you can choose to delete it. Simply click the Delete link to remove any unwanted photos. But please take care as this cannot be undone.
Polls Page and Voting This is how your polls will now lay out of the page your Users visit. Notice all the polls in the Top section (Upcoming Polls) are still in the Acception submissions status. Your Users will click the Submit Image link to upload a photo to this poll. The next level down is the Current Polls. Your Users will click the View Images link to place their vote.
Placing A Vote: When a user decides to participate in a poll, they will click the View Images link for the said poll. The new page will open to display all pictures for the current poll and a link (as seen circled below) for voting. They need only click the link to vote for a picture.
The User will only be allowed to vote one time per poll. If they return to a poll they have already voted in, the voting option will no longer be available and instead the will see the poll results.
Ending a Poll and Declaring a Winner When the time comes to end your poll, you must do this manually. You will return to the Multi-Photo Polls section of your Admin Control Panel and click the Edit link for the poll you wish to end.
Next you will chnage the Poll Status field by using the drop down bar and selecting 'Ended'. You can also change your Introduction text at this time if applicable. This is now a good place to announce a winner or something to that effect. Ending a poll will automatically calculate a winner (by whichever photo has the most votes at time of closing) and all losing entries will be discarded. This action CANNOT be undone, so please be sure you are ready to end the poll before continuing. The winning photo will be archived.
Don't forget to click the
button at the bottom of the page to save your changes and continue. When your Users visit the Photo Polls page, they will now see three sections. The final section below Current Polls is now called Past Polls. This will act as an archive for poll winners.
Your system comes with two options for allowing voters to place their votes. You can either have the system record their IP address or you can require them to login. There are pro's and con's to each option and no way with either option to completely stop unscrupulous users from abusing the system and manipulating votes.
The option which records their IP address is good as it allows users to vote with literally one mouse click. This makes it much easier for them to participate and people are more willing to place their vote if not required to go through a lengthy process just to vote. Once that IP has been voted with, it is logged to the database and no one else with that IP can vote. The down side to this system is this may block users who are all on the same network (computers within an office building are often sharing a network, as are several computers from the same home). This instance cannot be helped, as it keeps unethical people from voting more than once.
The other drawback would be people using proxy connections, such as AOL, are assigned a different IP address each time they connect to the Internet. In these instances, it could allow for multiple voting.
We understand this system is less than ideal however since we are dealing with an online poll there are few options available to police it to try to keep people honest.
The other option is more accurate for counting votes, yet requires the user to register and login before they can cast their vote. This too leaves a margin for cheating however, as users with multiple email address could register multiple times.
In short, the choice is yours and these are the only two options available to allow voting and yet keep the votes as reliable as possible without permitting abuse. If you suspect one of your users is cheating, well, then shame on them. You should decide before beginning a contest how you will handle people who abuse the polls and advise them of the possibility of being disqualified if cheating is suspected.
The point is, you are going to have people cheat from time to time. That cannot be avoided. If you do not wish to deal with this ugly aspect and the few complaints of other users who feel cheated, then I suggest you do not use our polls plugins. There is nothing further we can do to keep people honest and it is an unfortunate fact of life that some people simply have no morals.
These contests are meant for entertainment purposes only and should not be taken to reflect an accurate representation of voting.
 For a complete list of the WYSIWYG Icons and what they do,
 In this area, you will need to first name your Poll in the