The Guestbook plugin is used for your users/visitors to be able to leave you a message regarding their experience on your site. This page is made available for all other visitors to see.
Installing this Plugin and Adding it to a New pge
You will first need to Install the Plug-in, if you have not already done so.
Next, it is important to know that just installing a plug-in does not make it accessible to your website's visitors. Once it has been installed, you will need to go to the Page Editor and 'set it up'. You will need to make it 'active', tell it where you wish the navigation link to display, and assign it the proper 'plug-in'. How to do this is explained below:
Setting Up Your Plugin
After clicking your Page Editor icon in your Admin Control Panel, you will need to click the text link for a New Page. In this example, we are going to set up the Guestbook plug-in. In the Page title we have inserted the page name. This title is also what will be displayed in your navigation menus. In the Link title we have entered ' Guestbook'. Remember, this is the name file that will be created and must be one word. Next decide where you wish the link to display. And finally, since this is a Plug-in, change the Page type from HTML, to Plug-in. Click the Create Page button to continue.
To complete the activation of your new Plug-in, you will need to change the Status from Hidden to Active. Next you will need to change the Plug-in to display from the default ' Business Directory' to the ' Guestbook', or whichever Plug-in you are actually installing.
See left example of changes.
Finally select Update Page.
Accessing this Plugin's Management Section
After you have completed these steps, you can click the Guestbook icon in your administrator control panel to further manage this plugin as explained below.
Guestbook
Home
Settings
Approvals
Once you have clicked the Guestbook icon, you will see a menu similar to the one above.
Editing the Guestbook General Settings
This is where you will set up your Guestbook options, preferences and add any custom text either above or below the Guestbook submissions.
Action for submitted guestbook entries:
Use CAPTCHA for spam prevention:
Stylesheet:
Action for submitted guestbook entries:
Here is where you can decide to either hold submissions until you can review them and approve/deny them, or you can set them to auto-approve and automatically be published on the Guestbook page with no action needed on your part.
Use CAPTCHA for spam prevention:
This will help control spambots from abusing the Guestbook by submitting automated spam messages. You can learn more about CAPTCHA here.
Stylesheet: (for advanced CSS users)
If you have a good working knowledge of CSS, you can use this area to change the way your Guestbook displays by editing the values seen in the textbox.
Click the 'Update Settings' button when finished making changes to any of the above fields.
Text above guestbook: Text below guestbook: These sections will allow you the ability to place content using the editor above and/or directly below the categories table on the Guestbook page. This is optional, if you need additional space to provide instructions, an announcement or even to just 'pretty it up' a bit.
Clicking the Edit Text button will allow you access to the editor where you can customize the content to be displayed in these areas. Please see the Page Editor Chapter for further details on using this editor.
For a complete list of the WYSIWYG Icons and what they do,
please click here.
Managing Posts
Approvals This is where you will be able to approve or deny any Guestbook submissions that are entered. If you have your Guestbook settings set to automatically approve, then you may not need this section very often unless you find submissions that have been auto-approved that are not appropriate and you wish to delete them.
 Guestbook
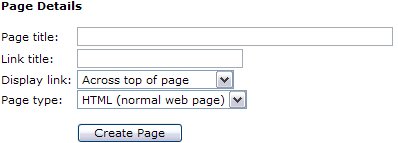


 For a complete list of the WYSIWYG Icons and what they do,