This will already be configured for you, but if you wish to make changes to these settings, this is the area you will need to visit. It is a good idea to go ahead and verify that no mistakes in spelling, etc, were made when installing your new site.
Suggestions for improvements to this plugin can be made here:
Suggestions made will be considered for future addition, but are not guaranteed.
What you will learn in this section:
- How to edit your General Settings
- How to edit the Tips block that appears on the Login page
- How to add custom text/content above and below the Registration form fields
- How to customize the Registration form fields
How to Access Your General Settings
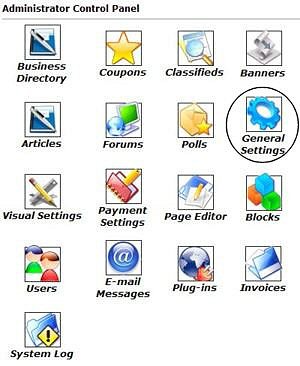
The first step will be to login to your Control Panel (this is the same Url as the User Login link on your homepage) using your administration username and password. You will want to click on the icon that is circled in this image (General Settings) in order to access and edit the basic settings that help run your site.
The Website Name should be the name of your new business. This field is used for the browser title bar, as well as a few other various areas of your site. To change the company name in your theme's header, please visit your Visual Settings area of your control panel.
The Contact E-mail is the address to be used in general for your site. This is the address to which all form submissions will be sent; contact page, etc.
The Notification E-Mail is the address you wish notices to be sent to when a new business has registered or a new ad (banner, classified, coupon, etc.) has been submitted. This email can be the same for both fields if you wish.
The Time Zone field is used to log all events as noted in your System Log in the control panel.
E-mail all administrators whenever a new user signs up
Checking the option box seen above will send a notification email to the administrator that a new user has just registered. This is just informational and no action on the admin's end is needed. It is fun to know when people are interested in your site. :)
Google Maps API key: The Google Maps API lets you embed Google Maps in your own web pages.
Use CAPTCHA image verification on registration form
This will help control spambots from abusing the forms by submitting automated spam messages. You can learn more about CAPTCHA here.
Cusotmizing your Register and Login pages
Login Page Tips Block: Click the [Edit Text] button to customize this block found on the right hand side of your login page if you wish to provide additional instruction for login help.
Account Registration Form Text: This section allows you to add customized text or content to the areas above and below your registration form fields. This area can be helpful for notifications or additional instructions for the registration process.
Account Registration Form Fields: Use this section to further customize your registration form by adding new form fields to collect information from your registered users. Though the pre-existing fields cannot be changed/deleted, you can create as many new fields as you wish. Keep in mind, however, the longer you make the registration process, the less users will want to complete it.