|
 Events Calendar Events Calendar
Installing this Plugin and Applying it to a new Page
|
You will need to Install the Plug-in, if you have not already done so.
Next, it is important to know that just installing a plug-in does not make it accessible to your website's visitors. Once it has been installed, you will need to go to the Page Editor and 'set it up'. You will need to make it 'active', tell it where you wish the navigation link to display, and assign it the proper 'plug-in'. How to do this is explained below:
Setting Up Your Plug-in
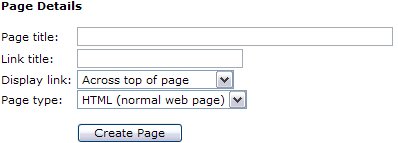
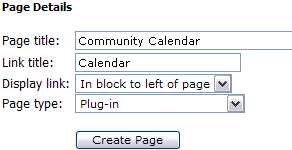
After clicking your Page Editor icon in your Admin Control Panel, you will need to click the text link for a ' New Page'. In this example, we are going to set up the Calendar. In the Page title we have inserted the page name. This title is also what will be displayed in your navigation menus. In the Link title we have entered Calendar. Remember, this is the name file that will be created and must be one word.
Next decide where you wish the link to display. And finally, since this is a Plug-in, change the Page type from HTML, to Plug-in. Click the Create Page button to continue.
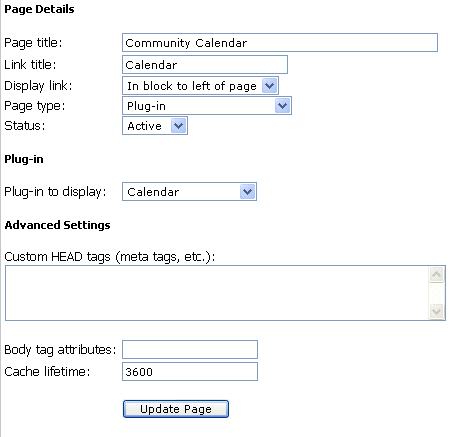 |
To complete the activation of your new Plug-in, you will need to change the Status from Hidden to Active.
Next you will need to change the Plug-in to display from the default ' Business Directory' to the ' Calendar', or whichever Plug-in you are actually installing.
See left example of changes.
Finally select Update Page.
Your calendar is now active, viewable and can be used by your visitors.
|
|
Managing Your Calendar Events
|
Clicking your Calendar icon in your Admin Control panel will show you the following options:

Each of these tab options and their features are explained below.
Events
This section allows you to manage events added to your calendar(s). You can choose to view events either pending approval or you can change the option titled 'List type:' to instead view all events that are already approved and active on your calendar. You can also sort events by Calendar type as well in the event you have * more than one calendar installed to your site.
* more than one calendar: Your hosting plan comes with one calendar, but additional calendars (if needed) may be added to your site for a small one time fee. Contact our help desk to request additional calendars if needed.
Events Pending Approval will layout like the below example:

It is broken down by pages to alleviate the issue with trying to load hundreds (sometimes thousands) of events all onto one page. All events are listed alphabetically. You can sue the page numbers at the bottom of the list to jump ahead pages to look at events further into the alphabet for management if needed.
Also if you know which event you wish to edit or delete you can now do so right from the calendar page itself by clicking the event in need of managing and using the appropriate links within the details block in the upper right hand corner (if logged in as admin).
The below list explains each of the options available to you for managing events awaiting review:
Send Email: Allows you to send an email to the person who submitted the event. This is helpful in many regards. For example, if they forgot to include important information such as event location or time.
Approve: Will instantly add the event to your calendar and the Upcoming Events block.
Decline: Will delete the event from the list and it will not appear in the calendar. This will generate an automated email to the submitter letting them know their event was declined. This action cannot be undone.
Decline (with custom message): Will delete the event from the list and it will not appear in the calendar. This will allow you to generate a customized email to the submitter letting them know their event was declined and perhaps the reason why. This is especially helpful for events that have been submitted more than once and a duplicate is being removed. This action cannot be undone.
Edit: This allows you to edit the details of the event if needed.
 Checking this box allows you to approve or delete this event in bulk with other events. Great for managing many events at one time. Simply check the box appropriate for all listings then use the option at the bottom of the list to apply the appropriate action: Checking this box allows you to approve or delete this event in bulk with other events. Great for managing many events at one time. Simply check the box appropriate for all listings then use the option at the bottom of the list to apply the appropriate action:
Action for selected events: Approve or Decline |
Editing Your Calendar Features
The next section of your calendars management is the Calendars tab:

This section will show you a list of calendars currently installed to your website. Your hosting plan comes with one calendar, but additional calendars (if needed) may be added to your site for a small one time fee.
To make changes to your calendar settings, click the Edit icon associated with the calendar for which you wish to make changes.  represents the edit link. Clicking the link opens lots of options to you for controlling the overall look of your calendar page. These options are detailed below. represents the edit link. Clicking the link opens lots of options to you for controlling the overall look of your calendar page. These options are detailed below.
Name*: Allows you to specify a name for this calendar. Helpful in the event you have more than one calendar installed.
Associated Page: Simply allows you to see which page of your site has this particular calendar installed. To change the page, please use the Page Editor icon as explained in the beginning of this tutorial.
Text Settings
Text Settings Text above calendar:
Text above calendar:
Text below calendar:
Text below calendar:
This section will allow you the ability to place a small amount of text below the search bar or directly below the events calendar on the calendar page. This is optional, if you need additional space to provide instructions, or an announcement.
When you change the text above or below the categories you will see the following:
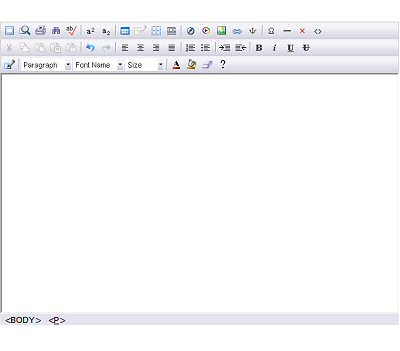
This is what your editor looks like. You can highlight and delete the current text displaying there by clicking and holding down your right mouse button and dragging it over the words Add your content here. And then clicking the Backspace button on your keyboard. Now you are ready to create your own text!
How to use this Editor is explained in the Page Editor chapter of our guide.
|
 For a complete list of the WYSIWYG Icons and what they do, For a complete list of the WYSIWYG Icons and what they do,
please click here .
|
Permissions
Who can submit items to this calendar: This option allows you to decide if you want to open the calendar to the general public to submit events or if you prefer that one with website administrators be able to submit events.
Allow posting for 'Guest' users: This allows you to specify whether or not users who can post listings must first login. Allowing 'Guest' postings will mean users need not login (or register) before listings can be submitted. Enabling this option will still hold events for review and approval by an admin though before that are published to the calendar for all to view.
Background Colors
This section will allow you a good amount of control over the color scheme of your calendar.
Each option is explained below:
View event: This color is displayed as the background color for the event title as seen in the calendar view. This is the area where a user must click the view the event details as a whole. We recommend choosing a pale color or the event titles may not be visible.
Edit event: This is the background color used for the popup box that is seen when an event is submitted/edited. Remember to keep your color a lighter shade to ensure the font for the event details remains easy to read. This font color for this section is not customizable.
Day cell date: This is the background color used for the rows that display the date of the current month. Remember to keep your color a lighter shade to ensure the font for the event details remains easy to read. This font color for this section (black) is not customizable.
Today cell date: This allows you to choose an alternate color for the current date block. This helps today's events to pop out easily to the person viewing the calendar. Remember to keep your color a lighter shade to ensure the font for the event details remains easy to read. This font color for this section (black) is not customizable.
Day of week (calendar view): This is the background color used for the row that display the days of the week at the top of the calendar while in calendar view. Remember to keep your color a darker shade to ensure the font for the event details remains easy to read. This font color for this section (white) is not customizable.
Day of week (list view): This is the background color used for the row that display the days of the week and the dates while in the list view. Remember to keep your color a darker shade to ensure the font for the event details remains easy to read. This font color for this section (white) is not customizable.
Title bar: Allows you to customize the background color of the calendar title/search box at the top of the calendar. Remember to keep your color a lighter shade to ensure the font for the event details remains easy to read. This font color for this section (black) is not customizable.
Click the Save button when you are finished making your changes. |
Calendar Maintenance
The next section of your calendars management is the Maintenance tab:

This helps you to 'keep house' by removing older events that are no longer needed. This will free up storage space on your hosting account by keeping the calendars database table size limited to only necessary events and by removing photos associated with older, un-needed events. Simply enter a number into the field provided and click "Go' to remove all events older than the specified number. Use with care! This option cannot be undone. |
Approving an Event
|
Once an event has been submitted the admin must approve the event before it will show up. The admin will received an email notification that an event has been submitted. From the Admin Control Panel you will want to choose the Calendar icon.
If there are events waiting to be approved, you will be able to see a preview of the event and the details such as the description, who submitted the event, the date of the event and how often it will show on the calendar. You will have the choice of [Approve] or [Decline] for each event. Upon approval, the event is visible to all visitors. If there are no events that need to be approved nothing will be displayed below the options.
|
Using the Calendar
|
The image below shows how the calendar is displayed on the site.

 To add an event to the calendar, click on a date and complete the form provided. Additional details on how exactly to do this are below this section. To add an event to the calendar, click on a date and complete the form provided. Additional details on how exactly to do this are below this section.
To view event details, click on the event name. A new box will popup with event details listed and closing the box will return the user to the calendar. This box also contains a handy little "remind me of this event' option for registered (and logged in) users of your site. They can choose how far in advance of the event they wish to be reminded.
To search events, type a word or phrase into the search field and click the search button.
To search the previous month or upcoming months, select the < Prev Month or Next Month > links to either side of the current month title. To view the events in a list format rather than a calendar view, click the List View button. List View button then changes to Calendar View button which will indeed return user to the default calendar style view of events. To print the calendar, click the Print button.
Add An Event:
To add an event to the calendar, click on a date and complete the form provided.
This is shown after clicking on date, but with the fields empty and awaiting the user to input the proper information, of course:
The information put in the short title is what is displayed on the calendar.
When a visitor clicks on the title they view the detailed information the description.
The Date is the choice that was made from the calendar, however if you click on the  image they can change the date, month, or year without leaving this page. It will open a calendar. image they can change the date, month, or year without leaving this page. It will open a calendar.
|

|
The information put in the short title is what is displayed on the calendar.
When a visitor clicks on the title they view the detailed information the description.
The Date is the choice that was made from the calendar, however if you click on the image they can change the date, month, or year without leaving this page. It will open a calendar.
|
The last option is Repeat when? How often the event will be repeated.
The choices are:
Never (one-day event)
On a daily basis
On a weekly basis *see Weekly basis below
On a monthly basis
On a yearly basis
If you choose Never (one-day event), you are finished and ready to click Submit.
If you choose weekly, monthly, or yearly you will have a few more choices. These are related to the Repeat option above. In this image the choice was on a monthly basis.
|

|
The first option is how how often the event is repeated. This example is set on every 1 month. This event will be included each month on the same date for the next six months.
The next option is how long do you want the event to run: Indefinitely, For this many months __ (weeks or years if that option was chosen) or Until this date (use to choose a date to stop showing the event)
If you choose * Weekly basis you will also be able to choose which days of the week to run the event on: Sunday, Monday, Tuesday, Wednesday, Thursday, Friday, Saturday. Choose one or all. |
|
If you wish to add an icon or an image with your event, clicking the Icons and Images >> link will open the following options:

The first field is for an image to be displayed with the listing details. This shows after the event title is clicked from the calendar or list view when a user wants more information about an event. Image files larger than 341KB will not be accepted. Images are automatically sized appropriately according to height and width to fit in the area provided.
The second image option is for a small image to be displayed on the front page in calendar or list view along with the event title. This helps you to draw more attention to your event. Image files larger than 341KB will not be accepted. Images are automatically sized appropriately according to height and width to fit in the area provided.
|
After the event has been submitted, the user is informed the event will be held until review by an administrator. |
How to Edit or Delete an Existing Event
|
An event can be removed (or edited) at any time by an admin from within the admin control panel by clicking the Calendar icon, then using the Events tab and options to show all approved events for a particular calendar.
It is broken down by pages to alleviate the issue with trying to load hundreds (sometimes thousands) of events all onto one page. Of course all events are still listed alphabetically.
Also if you know which event you wish to edit or delete you can now do so right from the calendar page itself by clicking the event in need of managing and using the appropriate links within the details block in the upper right hand corner (if logged in as admin).
To delete an event, find the event from the list and click the corresponding Delete link to permanently remove the event from the calendar. This cannot be undone. To edit an event, click the edit link and then apply your necessary changes. Admins are the only allowed users with the authorization to make changes to any event after it has been submitted. If a user needs to make a change to an event, they must contact the site administrator with the requested changes and the changes will need to then be applied to the event by the admin.
|
Scrolling Events Block
Your Calendar comes with a block that automatically gets installed as part of the plugin. This block self updates and displays the upcoming events within 30 days of the current date in a scrolling marquee. Each night it will remove events from the previous day and add new events for the dates within the next month. This functionality cannot be altered in any way. The block code is protected to keep its functionality in an operating order. The wording and block title also cannot be changed. You can access this block and apply it to any pages you want using the Page Editor's Manage Blocks  tool. You can learn more about applying the block in the Page Editor Chapter of this Guide. tool. You can learn more about applying the block in the Page Editor Chapter of this Guide.
The title of the block will default to Upcoming Events. If you chnage the name of your calendar or install your calendar as new, your block title will match the name of your event calendar. For example, if your calendar is called Local Events, the block title to apply will also be called Local Events. To see the name of your calendar so you know which block controls the event for that calendar click the Calendar icon in your admin control panel. Next click the 'Calendars' tab. Locate the name of your calendar under the section titled 'Existing Calendars'.
Note: The block cannot be created until at least one new event has been added and approved into the calendar (otherwise there would be nothing to display inside the block). The block will be created automatically and will display in your blocks list.
You need to apply it to pages yourself, however. This is not automated for you as the software has no way of knowing where you wish the block to appear.
|
|
|